
Last Updated on 10 May 2020 by Colette
Advertorial content
You may have read yesterday that we Dave has been working hard on redecorating Amy’s bedroom. The walls were stripped, sanded and re-papered with lining paper and ready to be painted and her Wallsauce mural put up. We had planned to paint the whole room on Saturday and then get the mural up on Sunday however we then read that the mural should not be applied to freshly painted walls as this affects the effectiveness of the adhesive. Instead the plan was to put the mural up and get the rest of the room painted after.
So having spent all of Saturday getting the walls finished Sunday brought with it the trials and tribulations of the Wallsauce mural.
Wallsauce offer made to measure wallpaper murals in an array of designs ranging from stunning photography to bright, exciting illustrations. You can even upload your own photos or illustrations! I spent a long time choosing Amy’s mural (and getting distracted by murals I’d quite like for my dining room instead). One factor to bear in mind is that a lot of the images are square so if you have them made to fit a rectangular wall you risk losing some of the image. In the end I decided to go with a square image and maintain the proportions with the intention of fitting it in the middle of the wall leaving a margin of plain wall on either side. As it turned out we decided to put the mural on another wall which turned out to be all but square!
At this point I’ll hand over to Dave to let you know his point of view on the experience of hanging the Wallsauce mural:
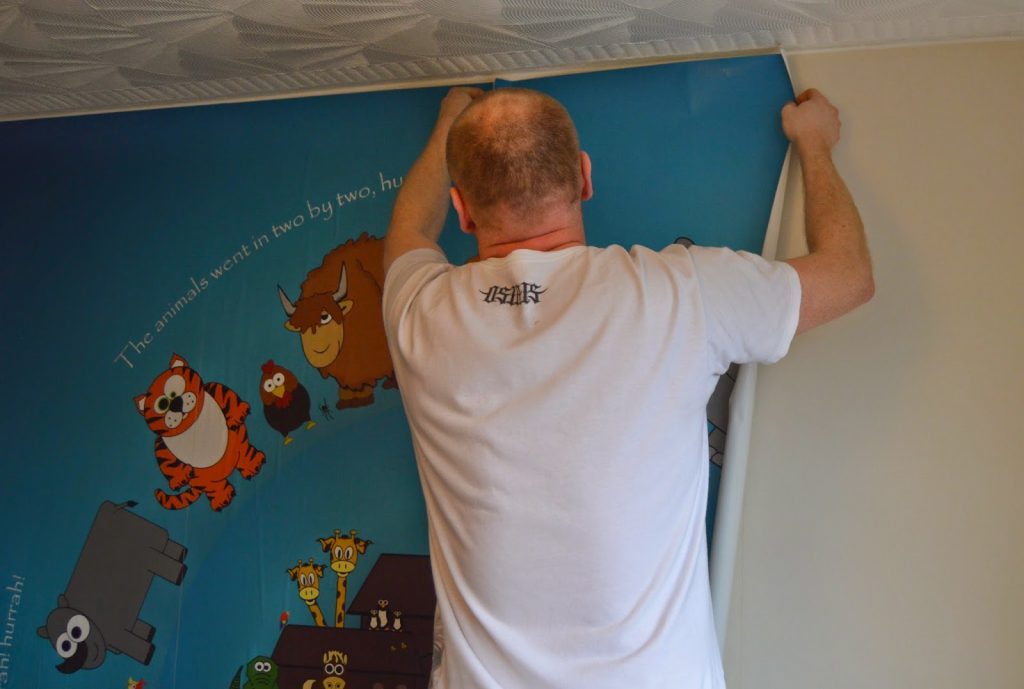
I’m reasonably experienced when it comes to wall papering, and I’d recently hung an ‘Avengers’ mural in Ben’s room which turned out pretty well so I was unconcerned about hanging the mural in Amy’s new room. Colette had ordered a mural that was bang on size for the wall so there was no cutting required. After reading the instructions I marked a couple of lines on the wall using a spirit level for the 1st ‘drop’ and set about hanging the first piece. This is where the problems started.
The mural is self adhesive, it just needs water spreading on the back and it’s good to go. In the instructions it says you should hang the drops within 30 seconds of putting water on the back! That’s a bit tricky when the drop is 60cm wide and 2.3mtrs long! Our pasting table is only 1.8mtrs long. So after spreading water on the back and moving the drop along to spread more water on the back, making sure you cover the whole piece, you pick it up and move towards the wall.
As you move towards the wall the drop rolls around and sticks to itself! And you! And the floor! And the door! (I’m glad the kids weren’t in the room or else I’d have pasted them into the wall like some sort of wall covering prison!) Basically, anything that is anywhere near you will now be stuck to this piece of paper which should have been on the wall 30 seconds ago! Don’t panic!
Anyway I struggled with the first drop. Trying to keep it within the lines I’d drawn and then trying to remove the bubbles. Which were everywhere.
WARNING!!! – The printing is quite delicate and even rubbing it with a damp cloth is enough to remove the colouring and leave a white mark behind. If the paper creases, as you’re moving it or trying to remove it from anything it may be stuck to then it’ll leave a white mark where the print has cracked. Just so you know.
After much rubbing with a damp cloth and smoothing with my hands the bubbles were still all over the the shop which I wasn’t very happy about. I then tried a wallpaper roller (for pressing the edges of paper to the wall to guarantee adhesion), this seemed to help but meant me going over and over and over bubbles only to see them reform a minute later!
Once the first drop was up I had a little swear, and a little cry. After that I gathered myself together and set about putting up the other three drops. I struggled with aligning the drops proper and trying to eliminate gaps. Alignment wise some of the animals will line up perfectly. Whilst others are slightly off, which makes me wonder if the printing is a little off? Gap wise all I can say is that at the top the drops touch and at the bottom they over lap slightly (on some of the pieces) but in the middle there is a noticeable gap. This makes me wonder if the drops are slightly curve? However I’ve probably just pressed them into the wall in such a way as to create this effect. After I’d hung the drops there was lots more pressing out of bubbles. This still left plenty of bubbles which I was fairly annoyed with.
We went out to do some shopping once I’d finished so I didn’t see the mural for a good few hours. When I cam back to it lo and behold some of the bubbles had magically disappeared! The next day all of the bubbles have now disappeared!!!! I can only think that this is normal and that as the pieces get wet they expand, and contract as they dry (either that or the wallpaper fairies have been round to help out!) but it certainly doesn’t mention this happening in the instructions.
Now it’s done it looks good. Not perfect, but I concede that was down to me. Lack of skill and experience. I’m sure if you know what you’re doing with this sort of thing or get a professional to do it you’ll get an amazing looking wall. Even with my half baked skills it looks nice. It was pretty hard work and quite stressful but I think doing it again would be easier.
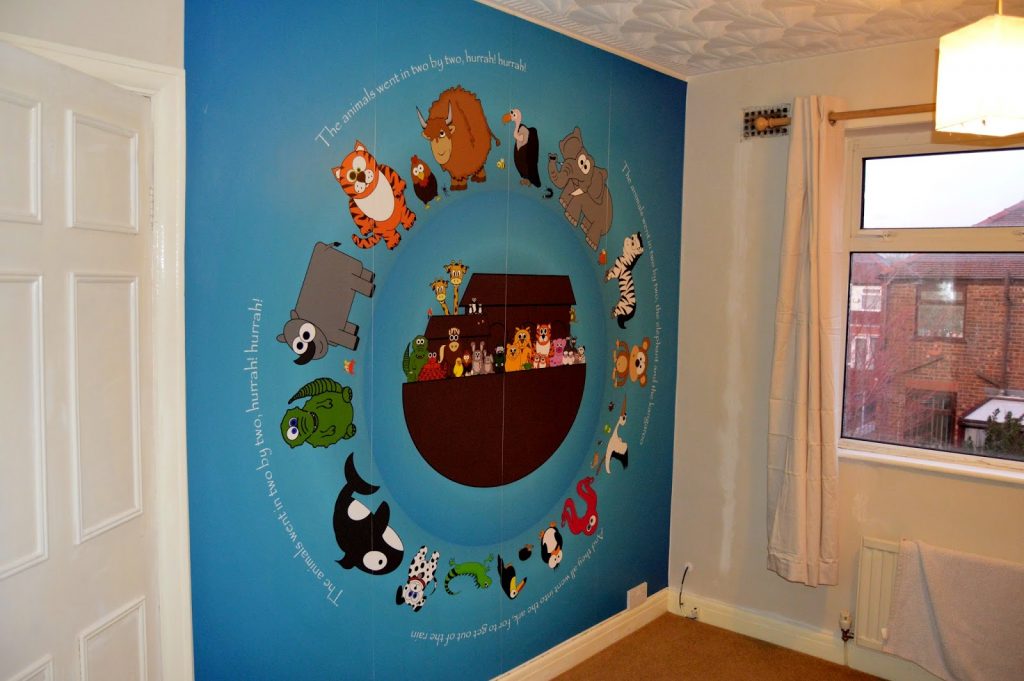
What we love about the Wallsauce mural:
* The made to measure service is fantastic as it means you know the mural will fit well and you won’t have to chop off parts of the picture
* The colours are bright and the print quality good (if easily damaged)
* The fact it is pre-pasted means you don’t need to worry about mixing up a load of wallpaper paste for just for a few drops of paper
What we’re not so keen on:
* It would be easier to put up if it came in half sheets rather than full drops
* The 30 second time limit to get the mural on the wall is tight
* The print rubs off if you press to hard as you try to move the paper around the wall or remove air bubbles
* It’s really tricky to get the paper on the wall without enormous bubbles – and even harder to get rid of them
* It’s is by no means a cheap product – at around £150 for a mural like Amy’s you can’t afford to make mistakes
* The fact it is pre-pasted makes it tricky to hang – Dave felt it might have been better with normal wallpaper paste as it would have give it more slip on the walls to maneuver it into position
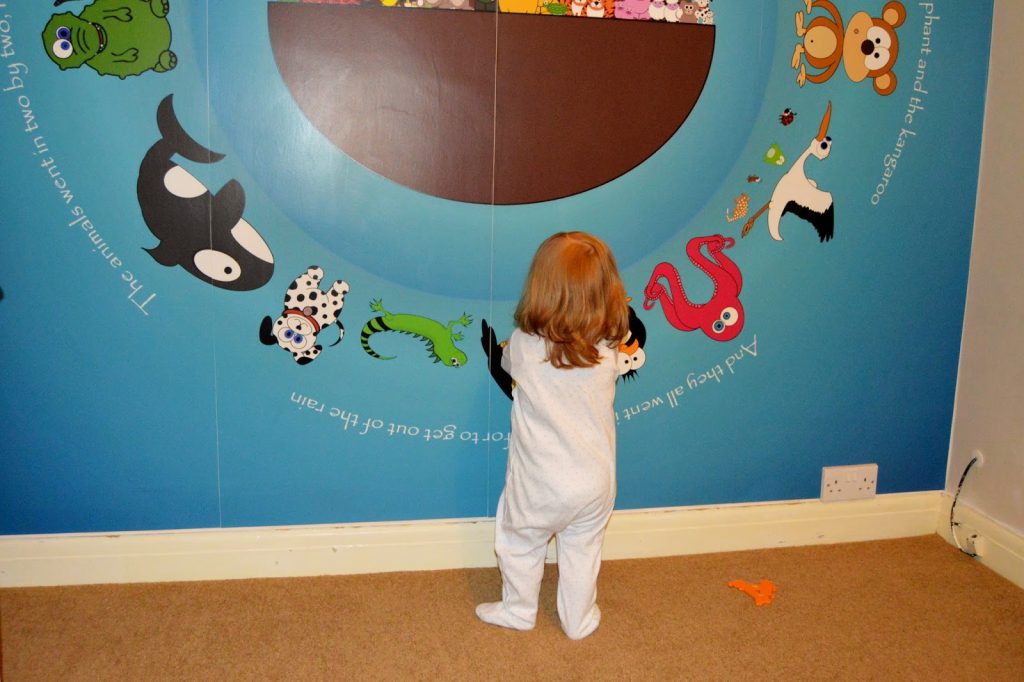
Essentially we’re really pleased with the Wallsauce mural even though it was a compete nightmare to get on the wall. It would have been a lot easier with a second pair of hands (rather than a blogger wife with no experience of wallpaper who just took photos) or even better still handing the job over to a professional. This isn’t a cheap decorating solution and you don’t want to make a pig’s ear of it and end up wasting your money!
So this is Amy’s nearly finished bedroom . . . her new curtains are up but need a good iron, and the walls need painting (though as these are going to be magnolia they won’t look much different to what they do now). There’s still plenty of sorting to do but we’re getting there!

We were sent the Wallsauce mural free of charge for the purposes of review however all thoughts and opinions remain our own. We have been compensated for our time spent decorating and writing about the product
Oh wow. I can feel Dave's frustrations reading that. Normal wallpaper would be better and it's annoying that the print rubs off, especially as it isn't cheap. It looks nice though! x
You can imagine he was turning the air blue at the time but I think he's pretty pleased with it now. You obviously just need to be really careful with it – certainly more so than the standard wall paper he's used to dealing with.
That is such an amazing mural wall. I think my brother in law would love something like this. I can't wait to own my own home and do things like this
It's so exciting to finally have control over your decor! (Though I think my husband would suggest the novelty has worn off somewhat for him 😉
I think Dave would have found it a much easier process with an extra pair of hands. Ours was a two man job and Ian and his Dad did it in just over an hour. Amy's wall looks fab though,he's done a great job.
I think you're right – it just didn't even occur to us as he's never needed an extra pair of hands with papering in the past and we just assumed it would be the same really.
Gosh it sounds sound tricky to do, no wonder Dave was swearing!! It does look good though so well done to him!
I'm amazed he stuck at it – I'd have ripped it down and chucked it away lol.
It looks great but we are not paper hanging experts here, so I fear we would definitely have made a pigs ear of it! Pricey but effective. Amy sure looks like she loves it.
Yes every time she goes in her bedroom she toddles up to it to inspect all the animals 😀 x
It does look tricky to hang but wow what a result! I didn't even know you could get things like this so thanks for sharing 🙂
So effective isn't it.
I can feel the pain that your hubby went through to put this up!.
I think it is a little pricey however I suppose that is because it is made to measure.
It looks fab though 🙂
Yes I've certainly seen cheaper murals but they usually have to be cut to size.
That wall looks great – It does look very difficult to put up though!!
What a fantastic mural. Doesn't sound easy to put it up though!
#triedandtested
It looks amazing, this is real life reviewing, I would have been swearing and crying a lot, but glad he persevered as its gorgeous and the only people who notice the mistakes will be Dave and that soon disappears. Great review.
Yes – it's important to be honest isn't it 😀
It does look lovely now it is up, however, there is no way my OH would have been able to cope with the stress of this, he struggles and moans enough with normal wallpaper!
Oh colette what a gorgeous mural on the wall. Great bedroom makeover. I really need to revamp my two kids' bedrooms as they both are still in nurseries. OOPs at 2 and 4 we need some big kid beds and bedrooms to match soon. Lovely hun. Thanks for hosting. #triedtested
Oooh you'll so enjoy giving them more grown up spaces! 😀 x
Oh wow, I would have been in tears and throwing things I think! But from the photos, it looks great in the end. A really good review though, definitely worth knowing what you're letting yourself in for…
Yes I definitely would have run out of patience myself!
What a stunning feature wall!!! Great result after all the difficulty of putting it on. #triedtested
Wow this is great mural, looks great, though it is a shame that it was so awkward to put up
That mural looks amazing but it does sound like it was a nightmare to put up! Glad the bubbles disappeared in the end.
That mural looks amazing, but does sound tricky to put up.
This looks fab Colette. Worth the effort and the swearing but I agree, a job or the other half me thinks 😉
The Mother says – What a great well-rounded review. I can see why you got so frustrated but think you guys did a fantastic job. It's a bit pricey, I agree, but the effect is fab. I would certainly be dragging in the OH to coordinate this if ever we do this – we have been looking into something like this for Lucas's room so this is a great review for us to read.
That does look fantastic but sounds a bit of a faff to put up….
I'm sure it was all worth it though x
It looks great but I wouldn't fancy putting it up by the sounds of it-I'm useless at wallpapering!
It does look really lovely – I'd be concerned about putting it in the kids roo though if the print rubs off that easily though
Wow, being that price, I would expect it to be easier to put up, or the print to survive putting it up, not good with creases etc… however, the final end product does look really good! #triedtested
That looks stunning – we went for wall stickers in the end as slightly easier
This wouldn't be one for our house. I think we'd end up in a divorce as its bad enough when we wallpaper together.
It looks fab, but yes we wouldn't cope with how tricky it sounds. We did wall stickers when the boys were tiny and son2 still has them, although they're looking very ropey now #TriedTested
Wow that looks incredible, my son would love something like that! He is almost 2.5 and I'm thinking about decorating his room soon as its a bit babyish for him now. I'm not sure I could manage sticking that on the wall though, I might have to take the simpler option and go for wall stickers! x
Bless her, she loves it. Looks fab. x
Her room looks lovely and the mural is beautiful (although expensive). I def. wouldn't be able to hang that up so well done to your husband. But as some others mentioned, I think I'd go with the easy option of wall stickers.
What a wonderful way to decorate the room, beats a picture any day
You're both braver than me. I hate wallpapering. It does look lovely though and Amy looks very pleased which is all that matters 🙂
Wow, it looks amazing even if it was a pain to get on the wall. Good job Dave! #TriedTested
Wow! That looks amazing! We've recently returned to wallpaper after swearing off it for a few years. Luka wants superhero dinosaurs… x x
It looks amazing – although I can guarentee I would have been swearing too!
Oh wow, certainly looks difficult to put up, I think I would've given up on hubby's behalf and gotten someone else to do it!